

Temporary metal roof tile repair refers to short term fixes which prevent leaks and withstand the elements until a full repair, or replacement, can be made.
In Los Angeles, quick patches count following Santa Ana winds, sudden downpours or heat-driven fastener-loosening expansion. Typical stopgaps are butyl tape, urethane roof cement, peel-and-stick flashing and sheet-metal patches cut to fit.
It’s a lot easier to seal with screws with neoprene washers. To schedule safe, quick work and prevent additional damage, the guide below details steps and equipment.
Assess Your Roof Damage
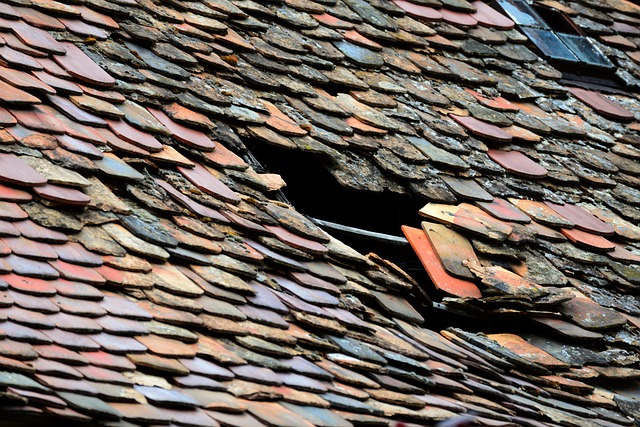
Begin with a roof over your head. Put buckets under any drips, move furniture and cover valuables with plastic. Then evaluate from the ground using binoculars, or from a secure ladder. If the roof flexes, is slick or winds are high, put it down and call a pro.
Heat, UV, wind, foot traffic and even tree limbs can wreak havoc, not just storms. Record all problems and patch jobs with good photos for insurance and future reference. If you are dealing with a leak, prioritize the area with active leaks, ceiling stains, or damp insulation.
Employ simple windproofing—sandbags on tarps, taped edges, secured sheeting—to prevent additional damage.
Damage type | What you’ll see | Extent clues | Temporary method |
|---|---|---|---|
Punctures | Holes, missing paint around impact | Wet decking, daylight visible | Clean, dry, patch with butyl tape or metal patch; seal edges |
Scratches | Lines in finish, bare metal | Rust flecks, chalking | Clean, prime with rust-inhibiting primer, coat with elastomeric |
Loose tiles | Lifted panels/shingles, rattling | Gaps, shifted overlaps | Reposition, secure with screws and neoprene washers; tape seams; tarp if needed |
Failing sealant | Cracked seams, split caulk | Water trails, soft spots | Remove old sealant, clean, reseal with compatible silicone/acrylic |
Punctures
Chalk mark each hole so you can locate it again. Look for nails, broken branches, hail dents. Remove sharp debris to avoid new rips.
Size the hole. For pinholes, a drop of exterior-grade sealant can do the trick. Anything smaller than a pencil eraser, butyl-backed roofing tape. Dime-size and up, a pre-cut metal patch with sealant around the edge.
Be sure the surface is dry and clean – moisture under a patch will beat the seal. Press and roll to set.
Scratches
Deep scratches bare steel or aluminum and welcome rust or pitting. Wash with mild soap and water, take off loose rust with a nylon brush, then dry.
A rust-inhibiting primer on exposed metal, then after it flashes, an elastomeric roof coating or touch-up paint matching the panel system.
Monitor these areas following hot LA days where UV and heat can accelerate damage. If you spot fresh rust or moist trails, recoat.
Loose Tiles
Locate any panel or shingle that moves in wind. Wind can turn a small lift into a blown off section. Re-seat the shingle so it overlaps as intended.
Screw and neoprene washer fix into existing holes whenever possible to avoid new penetrations. Tape over short seams that want to lift.
If you can’t resecure, tarp from ridge to eave, anchor at edges and bag the corners. Tape seam edges to reduce wind lift. For adjacent tiles, check for shifting.
Failing Sealant
Check seams, roof-to-wall joints, skylights and flashing. Old sealant cracks and allows water to sneak in. Scrape out failed beads, wipe with mineral spirits if manufacturer permits, and dry the joint.
Install a fresh bead of compatible roof sealant—silicone for metal is typical—tool it to shed water and then allow it to cure as directed on the label before rain. Caulk can plug minor pinholes in the meantime.
Your Temporary Repair Toolkit
A properly constructed kit for emergency roof repair minimizes downtime during storms and restricts in-home damage from roof leaks. Match each to your roof type, double check compatibility on labels, and store it all stashed in one bin for grab-and-go action.
- Heavy-duty waterproof tarps (10×12 ft or larger), bungee cords, ratchet straps
- Roofing tape, butyl tape and metal rated patching compounds.
- Rubber roof patches, sheet metal offcuts, roofing cement or sealant.
- Spare roofing screws, nails, neoprene washers, 2x4s or wood planks
- Putty knife, utility knife, tin snips, hammer, cordless drill
- Measuring tape, marker, stiff brush, rags, mild cleaner, denatured alcohol
- Fall harness, anchor, line, anti-skid boots, gloves, hard hat, safety glasses
- Stable extension ladder, ladder stabilizer, extension pole
Essential Materials
If you have metal roof tiles, opt for 8–10 mil+ rated tarps and strap them down, not just duct tape. Roofing tape and butyl tape seal tiny seams. Rubber roof patches aid on punctures. Sheet metal protects bigger holes when trimmed to overlap by a minimum of 2 inches.
Apply roofing cement or a quality polyurethane or MS polymer sealant marked for metal. Ditch the plain old latex. Sealants only work on clean, dry surfaces, so brush scrub, rag wipe, and alcohol spot-clean!
Store spares of screws with neoprene washers to re-seat loose tiles and stem capillary leaks. Got a nail last resort on metal. For extra grip in high wind, lay 2x4s over tarps or patches and screw them to battens, not through live leak channels.
Bring cleaning products, because stickiness is all about prep. Dirt, rust dust, and wet film destroys bonds. Once it’s cleaned, others just give it a quick-dry protective coating to stall corrosion until pro service. Tarp is still the quickest way to stop water intrusion.
Necessary Tools
A putty knife of cement a utility knife trims tapes and tarps, tin snips cut sheet metal into shape, and a hammer pings temporary repair nails. Select tools you can operate with gloves on.
A cordless drill with self-tapping screws accelerates securement and minimizes slipping-around time on the roof. Have bits and a magnetic tray in your pocket.
Measure twice. A tape and marker keep gaps, wasted material, and weak edges from sneaking in. Measure, measure, measure, and mark cut lines on the ground before you climb.
Take advantage of a sturdy extension ladder and, for ridge work, an extension pole to position tarps without stretching.
Safety Gear
Wear non-slip boots with soft soles and cut-resistant gloves. Wet metal is slick and sharp edges are everywhere.
For steep or high pitches, clip into a rated harness and fixed anchor. A minor stumble turns to a deep tumble without it.
Nothing like a hard hat and safety glasses to protect you from blown debris, fasteners and tin snip shards. Place the ladder on level ground, utilize a stabilizer and tie it off.
Work when winds are calm, monitor patches after each rain, and remember: temporary fixes may hold days to months, but they are not permanent repairs.
Perform Temporary Metal Roof Tile Repair
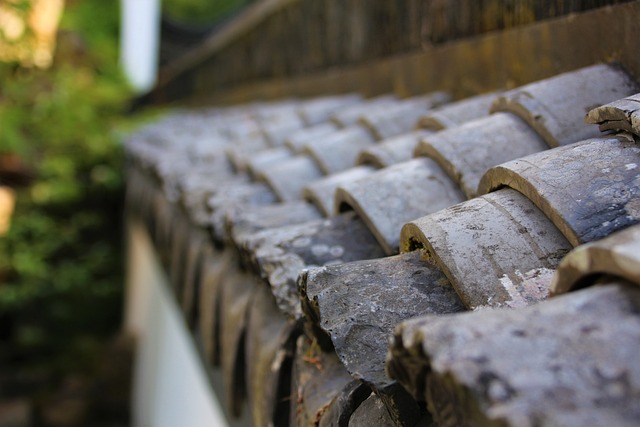
Temporary repair keeps water out and gets you the extra time you need when a roofer can’t get there – like during a holiday weekend. In SoCal UV and hot summers tend to accelerate metal fatigue, dry out sealants, and loosen fasteners.
Utilize safe access, non-slip shoes, and fall protection. The fast alternatives are sealants, roofing cement, spray foam, sheet-metal patches and plastic tarps. A simple patch job can be around $200–$600 in materials and labor, DIY might cost less but is dangerous.
Clean the work area.
Seal small leaks.
Patch larger holes.
Refasten loose tiles.
Temporarily tuck missing tiles. Apply U.S.-available products, and match sealants to metal type. A 100% silicone rubber sealant adheres firmly, remains flexible, and is heat tolerant.
1. Clean The Area
Knock off grit, leaves and rust flakes with a stiff brush and then rag wipe so repair products adhere.
Dry panel completely. Sun and heat in L.A. Assist, but a towel accelerates. Water imprisoned beneath a patch will fail later.
Light mildew can be treated with a mild cleaner, then rinsed and dried. Heavy mold means a more long-term moisture problem.
Check for hairline cracks at seams, loose fasteners and worn gaskets when the surface is clean.
2. Address Small Leaks
Coat pinholes, seam separation or small cracks with roofing cement or an appropriate sealant. Silicone is a good play on metal for heat and UV.
With a putty knife or caulk gun, press material into the gap and feather edges. Fill around screw heads that spin.
Make sure sealant compatible with your roof’s coating (galvanized, Galvalume, painted steel or aluminum).
Allow to cure per label prior to rain. Some silicones skin in minutes but require hours to cure.
3. Patch Larger Holes
Sheet metal cut or tarp patch heavy duty that extends the hole by a minimum of 3 – 4 inches all around. A rubber roof patch works, too, on flat seams.
Attach metal patch with screws and butyl or sealant under the flange. Perform a temporary metal roof tile repair — tarp it if storms are coming fast, with capped nails or screws on sound areas.
If you have bare metal, use a rust-inhibiting primer then an elastomeric coating for UV protection.
Seal edges with roofing tape or additional sealant. Check for fishmouths and press flat.
4. Secure Loose Tiles
Push shifted tiles back into position so laps face downhill and line up with neighboring pans and ribs for drainage.
Screw or nail into sound decking and add a dab of sealant under heads. Over-torque that dimple the metal, please.
Scan surrounding tiles for loose movement, cracked sealant or missing fasteners. Repair those to prevent wind lift.
If multiple tiles are loose, cover the area with a plastic tarp, drawn tight and anchored beyond the ridge and eaves.
5. Replace Missing Tiles
Measure the opening and cut a temporary piece from sheet metal, or a spare tile. 1/8-inch clearance for heat movement summer.
Set it to overlap, upstream laps. Then screw into structure, not merely sheet metal.
Seal edges with roofing cement, silicone or tape so water sheds clean.
Make a note of it for a permanent repair and get a roofer on the calendar soon.
The Temporary Repair Mindset
Temporary metal roof tile repairs serve as a quick solution to limit damage from roof leaks, acting as stopgaps while planning for more permanent roof repairs or replacement.
Accept limits: temporary fixes stop leaks and protect interiors, but they are short-term and need checks after each storm.
Act fast: limit water spread, mold growth, and deck rot by responding within hours, not days.
Document work: note dates, locations, materials, photos, and receipts for insurance and future bids.
Prioritize safety: use fall protection, non-slip shoes, and a dry-day window.
Budget smart: avoid serial patching that stacks costs. Compare to a permanent repair or section replacement.
Monitor weather: sun, wind, and temperature swings in Los Angeles can loosen tape and cure sealants too fast.
Schedule the next step: set a firm inspection date and line up a roofer.
Buy Time
Act fast when you see a drip or stained drywall. Because little leaks can wick along underlayment and into insulation within hours, that short delay can increase repair costs.
UV-rated tarps, roofing tape, butyl-backed flashing, or polyurethane sealant can prevent harm until a professional evaluates panels and fasteners. For holes in metal tiles, I’ve found a metal patch with roofing cement on a clean, dry surface works great.
Don’t wait for a ‘bigger problem’ to justify action. One missing fastener or lifted seam can make a light sprinkle turn into ceiling damage after a windy night.
Schedule a return visit within 48–72 hours of dry weather. Have the roofer inspect for fastener back-out, oxidation, underlayment condition and any soft decking. Make sure your temporary stuff can hang in there safely until the permanent work.
Monitor Weather
Check short range forecasts and wind advisories. Temporary fixes let us down most often during Santa Ana winds or the first heavy fall rain.
Before storms, place sandbags and/or cap nails at edges of tarp, tape across seams on windward side, re-roll tarp edges around a 2×2 to minimize flap. Heat-glazed or silicone sealants might require shade to cure, time installs.
Avoid doing rooftop work in rain, lightning, or winds over 30 mph. Slips and sudden tarp lift danger is significant.
Position additional tarps, tapes, gloves and a headlamp so you can patch new drips quickly once a storm moves on.
Plan Ahead
Keep a roof go-bag: heavy-duty tarp, 2×2 battens, screws with neoprene washers, utility knife, roofing tape, gloves, eye protection, and sealant.
Map shut-offs and bucket paths to protect interiors. Maintain a ladder stabilizer and fall harness.
Create checklists for issues: puncture, loose ridge cap, slipped tile, flashing gap, skylight leak, and vent boot crack. Record measures, supplies, and cautionary tips.
Vet local, licensed roofers, ensure metal-roofing experience, save contacts. Inquire about lead times post-storms.
Re-examine your policy on “temporary repairs” and “reasonable emergency measures”. Save invoices to back up claims.
When To Call A Professional
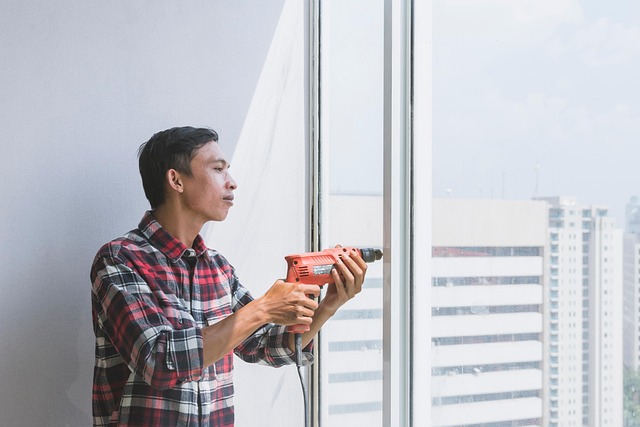
Temporary solutions for roof leak repair may purchase time, but they do not offer permanent security. Call a roofing professional when damage transcends surface-level patches, roof leaks just won’t quit, or safety becomes a concern. Maintain notes, dates, and photos of each temporary roof repair to orient the contractor and backstop insurance.
Widespread Damage
If big swaths of metal tiles are dented, creased, or missing following a wind occurrence, call in a professional. Ditto hail fields that pock many panels or rust creeping seams or multiple leaks across rooms. A band-aid in one place won’t prevent water seeking new routes two rafters over.
DIY in when the roof is 15+ years old and showing wear across panels, fasteners and flashings. At that age, patching is temporary and can hide more serious problems. Request a complete inspection which involves underlayment, fastener pull-out and corrosion mapping.
In a lot of cases, replacement is the wiser call, particularly on aging roofs or those with more extensive damage. Certain assemblies—stone-coated steel tiles or standing seam with concealed clips—necessitate specific tools, panel matching, and commercial-grade sealants. Mismatched parts or amateur “patch jobs” tend to fail quickly.
For newer roofs (under 10–12 years) with damage in one concentrated location—say, a single panel punctured by a small branch—a temporary patch might hold for a small window. However, a professional still needs to seal the definitive repair and check for unseen dents and loosened seams nearby.
Structural Issues
Call a roofer right away if you notice sagging lines, bowed purlins, soft or water‑soaked decking, or stains that continue to spread. These are signs of compromised sheathing or framing, not just a bad tile.
Don’t even step on suspect areas. Loads can shove compromised plywood to buckle without notice. Stake the area, tarp from a secure anchor if necessary, and keep foot traffic away.
Seek immediate inspection and repair to regain structural strength. If a leak begins at 10 AM, wet insulation can be dripping by noon and mold or ceiling damage can manifest by 3 PM.
Safety Concerns
When facing steep pitches, two-story roofs, or tight access areas, it’s crucial to call in a professional roofing contractor. Avoid DIY patch jobs that may not withstand severe weather conditions, such as heavy rains or gusty winds. Metal roofing can be particularly slick after storms, making it unsafe to attempt repairs without proper expertise.
If you encounter emergency conditions like major roof leaks, a hole from a fallen limb, or any openings exposing interiors, it’s essential to seek immediate emergency roof repair. Also, if your gutters have been clogged for years or you notice damaged tiles, it’s time to consult a roofing professional.
Neglecting poor upkeep can lead to significant water damage. If you notice mixed tiles or caulked-over seams, it’s wise to get a pro to assess the situation and recommend suitable roofing materials for repairs.
Post-Repair Roof Care
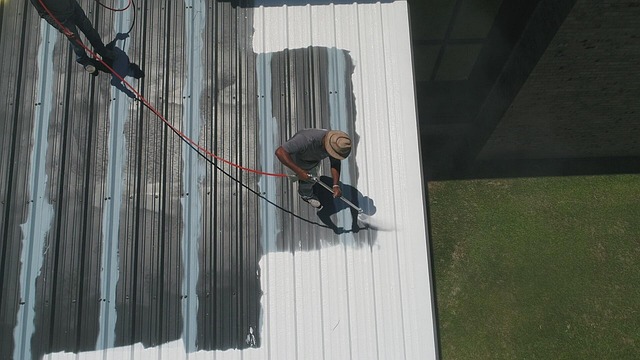
Concentrate on immediate soundness while considering long-term roof leak repair. A temporary metal roofing repair buys time, but it necessitates consistent maintenance to prevent significant water damage and larger expenses down the line.
Inspect your temporary repairs regularly to ensure continued protection against leaks and water damage.
Inspect patched seams, screws, and taped joints every few weeks, and after wind, rain, or an earthquake. Search for dings, scrapes, popped fasteners and caulk cracks. Take note of any rust bloom, oil canning, or lifted edges along panels.
If you deployed polyethylene plastic sheets for a stop-gap cover, make sure they’re taut, smooth and not flapping or ripped. UV is nasty in L.A., all year long, so watch for brittle tarps and sun-cooked sealants. If possible, perform a light hose test on a dry day to detect weeps around overlaps and vents and re-seal as needed.
Remove debris, leaves, and branches from the roof surface and gutters to maintain proper drainage.
Clear valleys, panel ribs, and gutters so water flows off quick during winter storms. Gently remove the debris with a soft broom or leaf blower, but DO NOT use metal tools that can scratch the coating.
Bag palm fronds, jacaranda blooms and eucalyptus leaves that moisture-trap and panel-stain. Flush downspouts and inspect for sagging hangers. Maintain a 10-foot buffer from tree limbs to reduce abrasion risk in Santa Ana winds. Proper drainage reduces standing water, which accelerates oxidation at cuts and edges.
Schedule a professional inspection and permanent repair as soon as possible to prevent future issues.
Quick bandaids are not a season-long strategy. Schedule a professional roofer for a complete evaluation and estimate for the permanent repair or replacement of broken tiles or panels.
Aim for seasonal checkpoints: spring check after winter rain, summer inspection for UV wear, and fall prep before the first heavy storm. Include a post-repair inspection around 6 months, preferably prior to the scorching heat or winter rains.
Inquire about flexible elastomeric sealants that move with day-to-day expansion and contraction, and specialized protective coatings that fight UV and oxidation. Good systems can tack on 20 years of service life.
Keep records of all repairs, materials used, and receipts for insurance and maintenance tracking.
Save dates, photos, product labels, invoices for patches, tarps, primers and sealants. Pay attention to lot numbers and where it’s applied.
Register warranties with the manufacturer and contractor within 30–90 days of work — late registration can void coverage. Neat files assist with insurance claims post wind or hail and inform future crews on what’s been applied and where.
Conclusion
So to save, quick patches on a metal tile roof can buy breathing room and halt leaks. Concrete actions are helpful. Pinpoint the culprit. Seal tight SCAMS Put screws down loose tabs. Replace a bad screw with a new. Patch it up with something that covers the opening. Dry days assist the patch to set. Fast inspections post-Santa Ana or a hard L.A. Shower reduce danger.
Think temporary, then schedule a complete repair. Take notes and click crisp pics. Keep track of them each by vent, valley or ridge. Pass that around to a roofer for quicker estimates.
Need a lift in LA? Request a roof check before the next storm. Need a sealant or tape size pro tip! Contact with roof type and panel gauge.
Frequently Asked Questions
What counts as a “temporary” metal roof tile repair?
A fast, temporary roof repair solution that secures roof leaks or loose panels until a professional roofing contractor can come out and administer a complete fix. This includes patching pinholes, re-securing fasteners, and coating with roofing materials like roof tape or sealant. It’s certainly not a permanent fix and should be examined shortly thereafter.
Can I do temporary repairs on a wet Los Angeles roof?
Avoid it. Wet metal roofing is slick and dangerous, especially during roofing emergencies. Expect dry weather, usually after a marine burn off. If roof leaks are present, get buckets inside and use tar paper for a temporary roof repair if it’s accessible from a stable ladder.
What tools should I keep on hand for emergency metal roof fixes?
To address roof leaks effectively, gather essential tools such as a rigid ladder, gloves, and safety glasses. Additionally, a cordless driver, sheet-metal screws with neoprene washers, butyl or acrylic roof sealant, and roof repair tape will aid in emergency roof repairs.
How do I stop a small leak fast around a screw or seam?
Clean the area thoroughly and allow it to dry. If the screw is too loose, replace it with a new screw equipped with a neoprene washer. For added safety, apply roof repair tape across the seam and seal the edges to prevent any potential roof leaks.
Is roof cement okay for metal roofs?
Use it judiciously, if at all. A lot of asphalt shingles and roof cements can crack or fail on metal roofing. Instead, opt for metal-safe butyl or polyurethane sealants for roofing emergencies. Always check product specs and temperature ranges for SoCal heat.
When should I call a pro in Los Angeles?
Call a professional roofing contractor if the leak is large, panels are bent, fasteners are stripped, or rust is extensive. This is especially important after any Santa Ana wind damage or if roof leaks persist despite a temporary roof repair.
How do I protect my attic after a temporary fix?
Watch for roof leaks the next storm. Utilize buckets or trays and cover insulation with plastic to prevent significant water damage. Increase air flow to ventilate moisture and consult a roofing professional sooner than later to verify the temporary roof repair and to plot a permanent solution.
2 thoughts on “Temporary Metal Roof Tile Repair: DIY Steps, Tools, and Safety Guide”