

Adding a second 200a breaker box, or subpanel, brings a lot of electrical capacity to a home for something like a workshop, EV charger or an ADU.
This project involves planning to conform to local LA building codes and safety standards. You need to obtain the appropriate permits from LADBS and know how to wire it correctly before you begin.
This tutorial will step through the crucial steps for a secure and code-compliant setup, from selecting the location to wiring the circuits.
Why Add a Secondary Breaker Box?
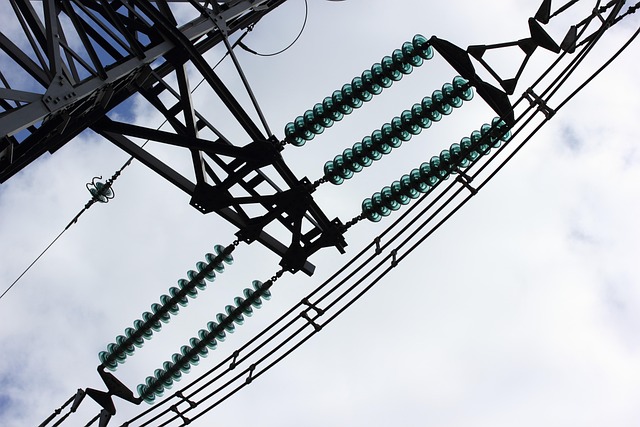
Installing a secondary breaker box, commonly known as a subpanel, is a useful option when your main electrical panel has run out of room for new circuits. Rather than replace or upgrade your entire electrical service, a subpanel increases your home’s capacity.
It efficiently delivers energy where you need it, either to a specific location or for high-demand applications, providing an economical means of handling increasing electricity demands.
Powering Workshops
A subpanel is a great way to provide dedicated electricity to a garage, workshop, or studio. This separates the large energy demands of tools and equipment from the rest of your house.
High amp tools — think table saws, air compressors or welders — can blow out a standard household circuit like nobody’s business. A subpanel avoids this by distributing energy directly from the main panel, so your workshop’s hustle doesn’t pop breakers inside your house.
This separation enables you to form several separate circuits throughout the workshop. You can have a circuit just for lights, several for general-use outlets, and 240-volt dedicated circuits for heavy machinery, enhancing safety and functionality.
As your shop changes, a subpanel with spare breaker slots makes it easy to add new circuits for new equipment down the road with no major rewiring.
Supporting ADUs
If you’re a homeowner installing an ADU, a subpanel is a common requirement. It gives you a distinct, self-contained electrical source for the new living area, making sure the ADU’s electrical demand doesn’t overload the primary house’s panel.
Local regulations in LA, for instance, require this separation for safety and code reasons. This strategy avoids overload and helps de-clutter your electrical system by keeping the ADU’s circuits consolidated in one location, which is imperative for diagnosis and repair.
It makes it easier to meter separately if you’re going to rent out the unit and need to bill electricity independently. If you’re adding circuits for appliances or outlets within the ADU, that becomes a simple matter as all the infrastructure is housed in its own dedicated panel.
Future-Proofing
Adding a subpanel is a prescient upgrade that future-proofs your home. It offers the additional breaker slots required to support the energy demands of an increasingly electrified life.
Our homes are more dependent on devices that require more energy than ever before. A subpanel guarantees that you will have extra capacity available for new additions in the future.
Whether you want to install an EV charger, add a hot tub, or do a kitchen renovation with brand new appliances, the fact that you already have a subpanel makes these projects so much easier.
This new electrical capacity doesn’t just provide convenience. It can help boost your home’s value, as prospective buyers will appreciate an updated, expandable electrical system.
Assess Your Existing Electrical Service
Before adding a secondary 200-amp breaker box, you must first evaluate your home’s current electrical system. This assessment determines if your existing service can handle the added load from new circuits. It involves checking your service capacity, calculating your total electrical demand, and ensuring the project meets all legal and safety standards.
An undersized service can lead to frequent breaker trips, flickering lights, or more serious electrical hazards. This step is crucial for a safe installation.
Service Capacity
Step one is to determine what your current amperage service is. You can determine this by checking your main breaker, which is the largest breaker at the top of your main electrical panel. This breaker will have a number stamped on its switch, like “100” or “200,” which is the amperage rating of your service.
Today, 200-amp service is standard in newer homes and may be required to sustain draw-hungry items like EV chargers and smart systems. This information is important as it establishes the maximum possible energy for your home. You can’t just add a 200-amp subpanel to a 100-amp service, for example. You have to do a complete service upgrade.
Load Calculation
Second, you need to estimate your home’s electrical load to determine how much of your service has already been allocated. This consists of totaling up the wattage of all major appliances, lighting, and outlets, then converting to amps.
The NEC offers formulas and demand factors for this calculation. These factors consider that not all circuits will be operating at peak load simultaneously, providing you with a more practical load estimate. A licensed electrician can perform a detailed load calculation to make certain accuracy.
This final load calculation, combined with the expected new circuits from the subpanel, cannot be greater than your main service capacity. If it does, you will have to upgrade your main service before adding a subpanel.
Code Compliance
All major electrical work should conform to the National Electrical Code (NEC) and local regulations. In Los Angeles, this means following the California Electrical Code and any requirements specific to the Los Angeles Department of Building and Safety (LADBS).
Proper permits need to be in place before work has started and final installation must be inspected and approved. This guarantees the job is performed properly and safely.
Adhering to these codes is not merely lawful. It is crucial to safety. A proper, code-compliant installation safeguards your house and family from electrical fires and other dangers. Your new subpanel continues to operate dependably for years to come.
Planning Your 200 Amp Subpanel Installation
Planning is the most important step of adding your 200 amp subpanel. A plan makes certain the installation is safe, code-compliant, and sufficient for your existing and future electrical demands.
We’ll walk through the entire process from choosing the location to obtaining permits for getting your 200 amp subpanel installed.
1. Choosing The Location
Your subpanel needs a location that is accessible for service and emergencies. Consider clearance requirements from local codes, typically a minimum of 36 inches clear in front of the panel.
So attempt to locate it close to your main service panel. This minimizes the amount of costly feeder wire you’ll have to run between the two.
It needs to be dry and protected from physical damage. Don’t install it in a damp basement, bathroom, or any location exposed to the weather except if you have a NEMA-rated outdoor panel.
2. Mapping The Circuits
Before anything, plan out every circuit you want to energize from the new subpanel. This diagram should explicitly mark what each circuit is for—such as “Kitchen Outlets” or “Shop Tools” and its exact amperage and voltage requirements.
Numbering each circuit on your map from the beginning avoids headaches during the installation and makes future troubleshooting or electrical work easier. A clear circuit map is indispensable insofar as balancing the loads across the panel’s bus bars.
3. Selecting The Panel
Select a subpanel with more breaker spaces than you need at present. This leaves you space for expansion without the need for another panel.
Just make sure that your panel is 200 amp rated and UL approved. It must have isolated bus bars for neutral and ground since neutral and ground must be separated in a subpanel.
4. Sizing The Feeder Wire
Calculating the correct feeder wire size is crucial for safety. 4/0 aluminum wire is the standard for a 200-amp service.
The National Electrical Code (NEC) permits some leeway. NEC 310.15(B) states that feeder conductors for a dwelling can be sized using a load calculation, which means if the load is less than 200 amps, you can use smaller wire, like #1 or #1/0 aluminum.
This detailed load calculation will tell you the required ampacity. Undersized wires can overheat and become a serious fire risk, whereas oversized wires are needlessly expensive.
Always check the NEC wire size charts and any derating factors to confirm your selection is code-compliant and safe.
5. Securing The Permit
Before beginning, contact your local building or electrical inspection department to obtain the required permits. You will probably be asked to submit your plans for review, including your circuit map and load calculations.
Having a permit means a qualified inspector will review the installation. This final inspection guarantees that your work complies with all local electrical codes and safety standards, keeping your property and family safe.
Essential Tools and Materials
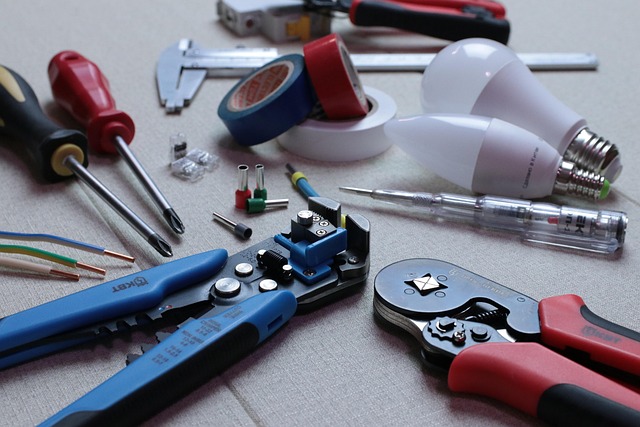
Collecting the right tools and materials prior to starting is an important step toward a secure and effective installation. Getting everything on hand avoids interruptions and makes certain that you get every connection made right. We’re talking about the subpanel itself, the right gauge or type of wire, specialized electrical tools, and of course safety gear.
Using quality components and tools that make the work easier is not just about convenience. It is crucial to being code compliant and having a dependable electrical system for years to come.
The Right Panel
Selecting the right subpanel is the grounding of this project. You’ll need a 200-amp panel that offers sufficient breaker spaces for all your intended circuits, with some extra for expansion. Seek out a panel with a dedicated ground bus bar. This is important for a subpanel installation as the neutral and ground wires must remain separate.
Make sure the panel is UL listed. That means it was actually tested for safety. It must meet NEC (National Electrical Code) and any specific local code in your area. Panels can cost anywhere from $100 to $500, so find one that fits your budget and satisfies all safety concerns.
Make sure the panel will work with your existing main service panel and type of breakers you’d like to utilize.
The Correct Wire
Choosing the correct feeder wire is essential. Undersized wire is a significant fire hazard. The wire size, or gauge, depends on both the 200-amp rating and the distance from the main panel to the new subpanel. A longer run may require a thicker wire to avoid voltage drop.
For a 200-amp service, you would typically use 4/0 aluminum or 2/0 copper conductors, usually THHN or XHHW insulated wire. The wire should be rated for the voltage and amperage of the circuit and the insulation type must be suitable for the environment, meaning whether or not it will be run inside, outside, or in a conduit.
Necessary Tools
The appropriate tools make the job both safer and more efficient. A non-contact voltage tester is indispensable for confirming that circuits are dead before you handle any wires. You will require some fundamental electrical hand tools, such as wire strippers, lineman’s pliers and an insulated screwdriver set.
To actually run the wire, you’re going to need a conduit bender, fish tape, and an electrical drill to route the conduit and pull conductors. A torque wrench is necessary for securing the terminal lugs on the panel and breakers to manufacturer recommended tightness. Loose connections can overheat.
The Correct Connectors
With the proper fittings, your installation is secure and code-compliant. To route wires into the panel, you need the right cable clamps or conduit connectors. Use Romex connectors for NM cable and threaded connectors for metal conduit.
If you’re working with PVC conduit, you’ll want PVC clips to fasten it down, male connectors to boxes, and couplings. To get into tight spaces or corners, you may need fittings such as offset nipples and 90 degree elbows.
Of course, grounding equipment, ground rods and clamps, provide that safe path to the earth.
Grounding and Bonding a Subpanel
Grounding and bonding a subpanel Unlike a main service panel, in a subpanel the neutral and ground paths need to be separated. This is accomplished by a four-wire feeder cable, which consists of two hots, a neutral, and a ground feeding from the main panel. For a 200-amp subpanel, this usually translates into no smaller than 4/0 aluminum SER or 2/0 copper THHN/THWN.
The grounding system should be NEC-compliant, especially with regard to sizing conductors per NEC Table 250.122. To make certain a correct setup, follow these guidelines:
- Do: Keep the neutral and ground buses separate in the subpanel.
- Don’t install the bonding screw or strap that connects the neutral bar to the panel enclosure.
- Do: Install a dedicated ground bar and bond it directly to the metal subpanel box.
- Don’t use the neutral bar as a connection point for equipment grounding wires.
- Do: Make sure all lugs are torqued to the manufacturer’s specifications to prevent overheating.
Isolated Neutrals
In a subpanel, the neutral bus must be floating or isolated from the metal enclosure of the panel, which is a significant distinction from a main panel where the neutral is bonded to the ground. This separation is crucial for ensuring the safety of your electrical systems, especially when considering amp breaker box installation projects. By removing the green bonding screw or strap that typically comes with the panel, you help prevent objectionable current from affecting equipment grounding conductors during normal operation.
When neutrals and grounds are not separated in a subpanel, it creates parallel circuits for electricity, leading to electrical noise on sensitive electronics and, more importantly, a shock hazard. Proper grounding is essential, as it ensures that the grounding system only carries current during a fault condition, fulfilling its intended purpose effectively.
This approach is vital for modern homes, where the efficiency of electrical upgrades can significantly influence overall safety and performance. Ensuring that your subpanel adheres to these guidelines not only enhances safety but also supports the longevity of your electrical infrastructure.
Separate Ground Bar
You need a separate ground bar for all equipment grounding conductors. This bar, which is usually sold separately, bolts directly to the subpanel’s metal enclosure for solid bonding. All bare copper or green-insulated ground wires from your branch circuits connect to this bar.
The ground wire from the feeder cable ends here. This gives each device and appliance a dedicated, dependable path to ground. By bonding the ground bar to the panel box, you’ve bonded the entire metal system safe.
A separate grounding lug can be bolted to the inside of the panel for the main grounding conductor, particularly with such big wires as 4/0 aluminum. This way, if a fault occurs, the current has a clear path back to the source, which will trip the breaker.
Grounding Rods
For a subpanel in a detached structure or building, you must set up a local ground electrode system, which usually means grounding rods hammered into the dirt. These rods offer an actual physical link to the earth, allowing it to absorb any electrical surges from lightning.
The rods, typically 8 feet in length, need to be driven their entire distance and then tied into the subpanel’s ground bar with an unbroken grounding electrode conductor, typically #6 copper or #4 aluminum. This local ground guards against electrical shock and stabilizes voltage.
It is no replacement for the equipment grounding conductor running back to the main panel.
The Professional’s Perspective on Installation
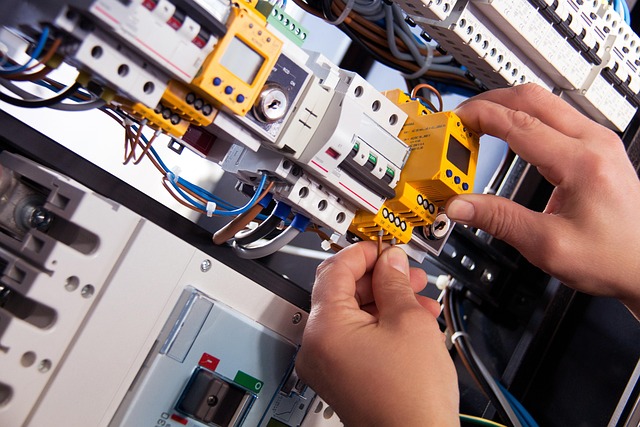
Installing a secondary 200-amp breaker box is no small electrical job, especially when considering the amp breaker box installation requirements. It requires a precise hand and rigid conformance to safety codes, as well as planning for proper grounding. A professional electrician usually needs 8 to 12 hours for this work, during which your home will be without electricity.
Feeder Breaker
Your main panel’s feeder breaker is crucial for the new subpanel’s safety. It safeguards the feeder wires and the entire subpanel against overloads and shorts, making proper grounding and appropriate breakers essential. Choosing a breaker that matches the amperage rating and size of the feeder wire is key, as a bigger breaker may not trip when it should, creating a fire hazard. Respect for the NEC guarantees the whole system is safe and compliant.
|
Feeder Wire Size (Copper) |
Maximum Breaker Amperage |
|---|---|
|
4/0 AWG |
200A |
|
3/0 AWG |
175A |
|
2/0 AWG |
150A |
|
1/0 AWG |
125A |
Running Conduit
Conduit is a raceway for the feeder wires between the main panel and the new subpanel. This is essential to protect the wires from both physical harm and moisture. The conduit you use depends on where it is going. For example, use PVC for underground or wet environments and EMT for exposed indoor runs.
The conduit needs to be bent without kinking and properly supported so it does not shift so that the wires within are not stressed.
Panel Mounting
Installing the subpanel properly is the basis of a secure setup. The box needs to be attached to the wall, usually to studs, with fasteners that will hold it up. The panel must be level and plumb or the breakers won’t fit right and operate correctly.
You need sufficient clearance around the panel, a minimum of 36 feet of clear space in front and 30 feet of width for safe access and ventilation.
Final Connections
Making these final connections needs to be done carefully to guarantee a safe and reliable electrical system. A proper connection checklist includes:
- Confirming the main energy is disconnected and locked out.
- Stripping wires to the correct length.
- Installing the ground, neutral, and hot wires to their respective bus bars and breakers.
- Tightening all terminal screws to the manufacturer’s specified torque.
Each circuit needs to be labeled in a tidy fashion on the inside of the door of the panel. This small measure is worth a fortune in future troubleshooting and maintenance.
The Inspection
After installation, you’ll need to arrange a final inspection with your local building department. This is a must to make sure that the work satisfies all current NEC and local code requirements. I would have your electrical permit and plans ready for the inspector.
If the inspector comes up with anything, it has to be fixed and then re-inspected. One mistake they refer to is putting in just one ground rod when you typically need two for a subpanel.
A passing inspection is the stamp of approval that your new subpanel is safe, code compliant, and ready for service.
Conclusion
Installing a secondary 200a breaker box energizes significant additions such as a workshop, an electric vehicle charger, or a renovated kitchen. This is not a minor project. It handles high voltage and has to comply with stringent local codes here in the U.S.
Mess it up and you can have serious issues, from failed inspections to fire risks. Safety first. For a job this involved, having an electrician take care of it is a wise decision.
All set to locate a top-notch pro for your project? Start with a few quotes from local, certified electricians.
Frequently Asked Questions
Do I need a permit to install a 200a subpanel in Los Angeles?
Yes, truly. In L.A., any significant electrical work such as installing a 200a subpanel necessitates a permit through LADBS. This way it is inspected and up to local and state electric codes for your protection.
Can I install a 200-amp subpanel myself?
It’s highly discouraged for a homeowner to attempt this electrical upgrade, as it involves serious high-voltage work. For safety and to meet LADBS codes, I always recommend hiring a licensed electrician for amp breaker box installation projects in the L.A. Area.
Can my main panel even support a 200-amp subpanel?
Not necessarily. Your main service must be bigger than 200 amps, usually 320 or 400 amps, to accommodate the installation of a second 200-amp service panel. A licensed electrician will perform a load calculation to ensure your existing power supply can safely support the additional wiring work for multiple circuits.
Why would I need a 200-amp subpanel instead of a smaller one?
A 200-amp subpanel is essential to meet substantial energy requirements, especially for modern homes like a large workshop, guesthouse, or a bank of high-capacity EV chargers. With ample breaker space for future expansion, it’s ideal for developing L.A. homes.
Does a subpanel need its own grounding rods?
It varies by location. If the subpanel is in the same building as the main panel, it typically doesn’t require separate grounding rods. However, if it’s in a detached structure, such as a garage or ADU, LA code mandates its own grounding electrode system for proper grounding.
What’s the main difference between a subpanel and a main panel?
The main panel, which is fed by the utility (LADWP), houses the main disconnect for your entire house. A subpanel, or amp sub panel, serves as an extension of your main electrical panel, effectively controlling and distributing power in specific sections of modern homes.