

Of course, there’s the issue of flashing around chimney with metal roof, i.e. Sealing the joint where the chimney meets the panels to prevent leaks.
In LA, sun, wind, and Santa Ana conditions push metal roofs and masonry to expand at different rates, so gaps form quick without proper step, counter, and cricket flashing.
Yl tape, high-temp sealant and corrosion-safe fasteners hold up in heat and coastal air.
The following sections address parts, tools, fit and code notes for neat, durable craftsmanship.
Understanding Chimney Flashing Fundamentals

A chimney flashing serves as the watertight barrier at the juncture of the chimney and the metal roof, specifically designed to prevent water intrusion from wind-driven rain, meltwater, and debris. When properly installed, this essential component protects the roof deck, attic, and interior finishes from leaks that can start as minor stains and escalate into costly repairs. Bad flashing can lead to significant issues like wood rot and mold, particularly around the chimney structure on metal roof installations in storm-heavy areas like Southern California.
The durability of well-installed metal roof flashings can last up to 30 years; however, factors such as bad weather, seismic movement, and UV exposure can expose weak points much sooner. Standard pieces include base, step, counter (cap) flashing, and a cricket for wide chimneys, all designed to overlap and shed water effectively, similar to shingles. These leaks often become apparent during thunderstorms or snow melt down chimney walls.
Standard pieces are base, step, counter (cap) flashing, and a cricket for wide chimneys—all overlapping to shed water like shingles and behaving like weather stripping for the stack. These leaks tend to reveal themselves during thunderstorms or snow melt down chimney walls.
Regular maintenance of the chimney system, including inspections and proper flashing, is crucial to ensure ultimate longevity and prevent water damage. Addressing these issues promptly can save homeowners from the challenges of water infiltration and the potential damage it can cause to their property.
Material Choices
Select metals that correspond to both the chimney (brick, stone, stucco, masonry) and the roof panel metal to prevent galvanic corrosion that typically occurs when copper comes into contact with bare steel or when aluminum is exposed to copper runoff.
In coastal LA and other marine areas, salt spray accelerates corrosion, so prefer higher-grade stainless or copper with appropriate isolation. Most inland roofs get aluminum or galvanized steel, premium jobs get copper or 304L stainless for longer life with less maintenance.
Use rust resistant, thicker gauges and isolate dissimilar metals with sealant, bituthene tape or gaskets. Match fasteners to the flashing metal and roof manufacturer’s specs.
- Aluminum: Pros—light, easy to bend, budget friendly. Cons—dents, galvanic risk with copper, coating nicks corrode.
- Galvanized steel: Pros—strong, cost effective, holds shape. Cons—zinc coat can wear, not good near ocean air.
- Copper: Pros—excellent life, solders clean, forms well. Cons—expensive, reacts with steel/aluminum if not isolated.
- 304L stainless: Pros—high corrosion resistance, stable in heat. Cons– more difficult to shape, more expensive than galvanized.
Metal Roof Dynamics
Metal panels expand and contract with heat and cold. That expansion and contraction pulls on flashing joints and can break seals if the system is stiff or over-fastened.
Flexible details count. Slip joints, hemmed edges, floating cleats—use them all so that flashing can move without tearing sealant lines.
Profile shape alters the design. Standing seam requires pan cutbacks and cleats that don’t crimp seams. Corrugated and ribbed panels require custom-formed side pieces and foam closures to fill ribs.
Sealants and butyl tapes need to be roof-rated, UV-stable and compatible with the panel finish. Fasten with neoprene washered, matching fasteners to keep penetrations dry.
The Four-Part System
Base (apron) flashing lies on the downslope side and delivers the highest water load into the panel pans. It must overlap with sealed, not crushed, panel ribs.
Step flashing ascends the sides in a stair pattern, each piece overlapped to kick water back onto the roof surface with each course or panel rib. The cricket (saddle) on the uphill side breaks up and redirects flow around wide chimneys—or on steep roofs that have high water volume—to prevent ponding and ice dams.
Counter flashing, known as cap flashing, is locked into a mortar joint or a reglet groove and covers the tops of the base and step layers, shielding those edges from wind lift and UV. Some mention two pieces—base/counter and an over-flashing—but the field-proven configuration has step, base and counter as key pieces, with a cricket when necessary.
How to Install Chimney Flashing
A full, safe workflow for metal roof installations amid LA’s sun, thermal movement, and Santa Ana winds includes precision, dry-in sequencing, and durable sealants essential for waterproofing.
1. Preparation
Remove all loose nails, leaves, old caulk, failed tape, and any rusted or bent metal. Tear rotted flashing back to clean, sound roof panels and solid masonry.
Lay out tools: measuring tape, speed square, tin snips, aviation shears, hammer, drill/driver with metal bits, caulk gun, masonry grinder for sawcuts, and a stiff brush.
Stage materials: chimney flashing kit, foam closure strips, pan/apron flashing, step flashing, counter (cap) flashing, roofing screws with neoprene washers, butyl tape, and high-temp exterior sealant.
Use a tied off extension ladder, safety harness and eye/hand protection. Verify chimney length and width; height is less important because flashing only extends a few inches.
Observe roof pitch and panel profile for metal sizing and step count. Mark exact cut lines on flashing with a marker and square to minimize trimming on the roof.
2. Apron Flashing
Set a foam closure strip down at the bottom chimney side to correspond with the panel rib profile and prevent wind-driven rain.
Next, screw in the pan/apron flashing so it drapes over the lower roof panel and several inches up the chimney face. Run butyl tape and a continuous sealant bead at all seams.
Secure with roofing screws on flats, not ribs, maintaining even rows. Tuck the upper edge under the next roof panel where you can, then ensure step flashing will lap over its sides for an uninterrupted water course.
3. Step Flashing
Cut separate step pieces, under each course/panel break, and rising up the chimney side, maintaining a 2″+ overlap each piece to the next.
Set them in a stair-step pattern: one leg on the roof, the other up the masonry, alternating with each panel/course as you climb both sides of the chimney.
Anchor every step with screws on the roof leg and a light bead of sealant between laps, never leaving gaps near ribs or seams. For long runs, supplement with butyl tape at laps to endure thermal cycling in LA heat.
4. Cricket Installation
Employ a cricket when chimney width is 18 inches or greater, when it sits at the end of a long rafter, or on steep pitches. Over 30 inches wide, it’s highly recommended.
Frame the cricket, sheath and cover with sheet metal tied into roof panels and the chimney base. Seal all seams and transitions to force water around the uphill side.
For very wide chimneys, install half-valley flashing down both sides to “chute” runoff from the cricket. Fasten to deck and masonry to prevent ponding.
5. Counter Flashing
Cut a 1/2-inch sawcut into mortar joints, at least 6 inches above the roof deck and 1 inch above existing flashing, parallel to the roof.
Cut four cap flashing pieces—each a few inches longer than the chimney sides to wrap corners—and embed them in the reglet, extending over step and cricket tops.
Fasten with masonry anchors, bend-tuck edges to fit tight, and caulk all joints and terminations so water sheds over, not behind, the base flashings.
Anticipate replacement costs of approximately $400–$1,600, depending on galvanized steel, aluminum, or copper.
Why Sizing and Design Matter

Improperly sized or designed flashing leaves voids where wind-driven rain can slide in, saturate sheathing, stain ceilings, and rot framing. Repair bills accumulate quickly, with leak repair costs ranging from $400 to $1,600, or more if framing and/or drywall repair is required.
Good sizing secures the flashing to the chimney and roof planes, and smart design—such as L-shaped step and counter flashing, as well as storm collars and cap flashing—directs water off the metal roof and around the stack. Length & width are most important, height just needs a few inches up the chimney to lap properly.
Measuring Correctly
Use a tape to record chimney width, length, and height above the roofline, and the roof pitch in rise-over-run (for example, 6:12). Measure each face, not just one side, as many chimneys are out of square.
Pay attention to exposed roof panels so step flashing laps line up with seams. Don’t forget to accommodate for veneer thickness from stucco, stone, or fiber-cement siding. Uneven faces and ledges require extended flashing legs and wider steps to span voids and maintain a seal.
Skipping this causes open corners and capillary leaks. Mark all cuts on the metal with a fine-tip marker, label faces (north, east, etc.) and double-check dimensions before bending. Incorrect cuts squander material and compromise coatings.
Checklist:
- Chimney width/length at roof plane and 6 inches above
- Height above roof
- Roof pitch (e.g., 4:12, 9:12)
- Veneer thickness and offsets
- Panel profile and rib spacing
- Distance to ridge/valley and prevailing wind
- Step flashing count and lap lengths
- Counter flashing kerf depth and locations
Cricket Necessity
Check if the chimney is 30 inches or wider across the upslope face, or if the roof pitch is steep (8:12 or more). In those instances, a cricket is not a choice, it’s best practice, and frequently code mandated.
That the cricket splits flow and prevents water from pooling at the back pan. Without a cricket, water piles up behind the chimney, discovers pinholes and makes its way to leak into the attic.
On metal roofs in heavy-rain zones or snow-fed foothills, the danger increases even more. Design the cricket using complementary panel material, appropriate saddle slope and sealed side transitions. Get it in the flashing layout from day one.
Panel Profile Impact
Profile of the roof dictates how the flashing fits, fastens and sheds water. Standing seam requires cleats, hidden clips, and tall back pans that lock beneath seams.
Corrugated and ribbed panels require cuts that follow the highs and lows without bridging. Form flashing to panel profiles. Include hemmed edges, kick-outs and stepped pieces that lap a minimum of 4 inches.
Utilize sealants rated for metal roofs and compatible with finishes, and fasteners with neoprene washers on flats, not rib peaks. Steer clear of one-size kits.
A made-to-measure or adjustable set works better for strange chimney configurations, oversized stacks or mixed materials. Go with galvanized steel for 20–30 years of service or copper for up to 50 years.
For vent pipes close by, provide for thermal movement so expansion and contraction doesn’t break the seal.
Adapting to US Regional Climates
Regional weather dictates how you select flashing metals, sealants and fastening patterns around a chimney on a metal roof. Codes vary by city and county, so verify approved metals, underlayment, fastener spacing and minimum overlaps. Be prepared for ice dams, wind-driven rain, UV, and humidity.
Customize your flashing system to roof pitch, local storm patterns, and roofing type—metal, asphalt, tile or slate—all common in various parts of the country.
Region factor | Risk profile | Material guidance | Install focus | Upkeep notes |
|---|---|---|---|---|
Heavy snow | Ice dams, creep | Galvanized steel, copper | Cricket, wide overlaps | Extra checks in freeze-thaw |
High wind | Uplift, wind-blown rain | Rated metals, screws | Dense fastener pattern | Post-storm inspection |
Intense sun | UV, heat cycling | Coated aluminum, stainless | UV-stable sealants | Watch for sealant cracks |
High rain/humidity | Pooling, corrosion | Nonreactive metals | Half-valley diverters | Seal edge laps often |
Northeast Snow Loads
Employ rust-resistant heavy-duty metal and creep-resistant packed snow. Galvanized steel with G-90 or better coating fares well. Copper will work, but watch for patina and joints in salt-sprayed zones.
For mixed-material roofs–metal next to slate or asphalt–use compatible fasteners to prevent galvanic action. Put a cricket in on the up hill side, to split flow and slush.
For those of you in a heavy snow region such as Upstate NY or northern New England, crickets are commonplace to prevent drift accumulations and meltwater from back-flowing.
Seal every step and counterflashing seam tight. Install butyl tape under flanges. Make sure to use high-temp underlayment at the chimney saddle – it can help buffer ice dams.
Extend overlaps to 6″ on the uphill pan, screw in more gasketed screws into framing, and install cleats on steep roof pitches. Homes with frequent freeze-thaw require more frequent inspections for popped fasteners and hairline splits.
Southeast Wind Uplift
Choose flashing and fasteners with proven tested uplift ratings for coastal storms. Stainless screws with neoprene washers and thicker gauge step flashing minimize blow-off potential.
On the Gulf’s low-slope metal roofs, supplement with half-valley style diverters to divert torrents away from sidewalls, reducing base-of-chimney pooling. Anchor into the roof deck and chimney masonry, not sheathing only.
Use reglets cut into mortar for continuous counterflashing. Then tape laps with reinforced roofing tape and bead polyurethane or silyl-modified polymer at exposed edges to combat wind-driven rain. Inspect following hurricanes, tropical storms or even fierce squall lines.
Southwest Sun Exposure
Pick UV-stable metals like coated aluminum or stainless. Copper and lead can degrade faster under intense sun, especially in desert climates.
Apply UV-rated sealants, avoid asphalt mastics that go brittle, and favor factory finishes or powder coat to slow fade and corrosion. Inspect twice a year for dried sealant, warped pans, or oil-canning that opens gaps.
Costs vary by region due to code-driven metal thickness, availability, and labor, but a right spec up front limits early failures. Ensure details suit local roof styles and pitches across the Southwest so water still clears fast in rare monsoon bursts.
Avoiding Common Flashing Failures
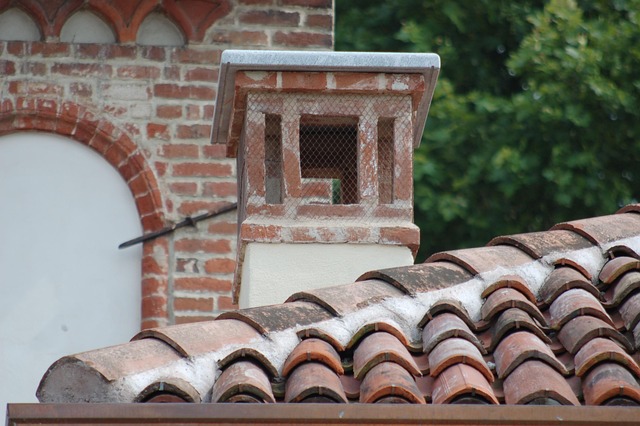
Chimney flashing on a metal roof often fails due to inadequate preparation and improper material selections, especially with essential components like metal roof flashings. Adhering to the manufacturer’s recommendations for your roof system and every flashing component—base, step/side, and counter (cap)—is crucial for maintaining a watertight seal against LA heat, coastal air, and winter rain.
Common challenges include ensuring proper flashing around vent pipes and the chimney structure to prevent costly repairs from water intrusion and moisture damage.
- Skipping roof panel repairs before flashing
- Using metals that react with each other
- Bad measurements of chimney base or roof pitch
- Rough cuts and bent flashing that won’t sit flat
- Loose base flashing or sparse fasteners
- Side flashing not lapped under panels or not sealed to brick
- Counter flashing that doesn’t overlap the side/base laps
- Relying on caulk instead of correct metal laps
- Cheap sealants, mismatched fasteners, and missing slip plates
- No semiannual inspections (spring and fall)
Sealant Dependency
Sealant is not the first line of defense. Metal laps and proper shingle-style layering and solid anchoring do the heavy lift. Consider caulk or roofing cement as backup only, at terminations, small joints or fastener heads.
Opt for a premium, flexible, UV-stable sealant that adheres to coated steel or aluminum and to masonry. Many professionals employ a neutral-cure silicone or high-performance polyurethane designed for metal and brick.
In LA’s sun and seasonal rain, expect to do touch-ups every 12–24 months, or earlier on south-facing slopes. If the metal laps are incorrect, adding more sealant will not repair the leak path.
Galvanic Corrosion
Avoid combining different metals. For instance, copper counter flashing on aluminum panels will pit panels and eat fasteners. Flashings and fasteners should be closely matched to the roof metal and coating system.
Although stainless fasteners can be safe, check with your roof manufacturer to make sure. Where different metals must meet—historic copper chimney saddles near modern steel panels—add isolation: non-conductive barriers, butyl tape, or compatible coatings at contact points.
Watch for early flags such as dark staining, rust blooms or paint blisters beneath your chimney and replace damaged sections before the damage escalates.
Thermal Movement
Metal roof and flashings move with heat. Let it expand so pieces don’t warp, crack or pull away at the chimney! Employ slotted holes where noted, proper fastener spacing, and do not over-tighten screws into base flashing or counter flashing.
Avoid lengthy, stiff runs around broad chimneys. Break pieces into shorter lengths with appropriate overlaps, then utilize expansion joints or an approved flexible sealant at long seams.
Once you’ve measured the chimney base and roof pitch exactly, before cutting, snip or shear the edges for a clean cut. Fasten base flashing knifed in tight and flat, tuck step laps and side flashing under panels and overlap sides of counter flashing.
Check twice a year—spring and fall—for early signs of gaps, cracked sealant or loose fasteners.
Retrofitting Your Existing Flashing
The scope covers evaluating failure, safe removal, and sound replacement of metal roof flashings in Los Angeles conditions, where sun, wind, and seasonal downpours stress joints and sealants.
Assessing Damage
Begin outside by inspecting the metal roof flashings for any signs of rust on step or counter flashing, pinholes, cracked sealant lines, or loose fasteners where panels adjoin the chimney structure. It’s essential to check for gaps at the chimney saddle/cricket, raised panel seams, or flashing that fails to nestle tightly against brick or stucco. UV exposure in SoCal can dry out caulk and butyl tape, so even hairline splits should be noted.
Next, go inside. In the attic or at the ceiling chase, look for water rings, damp insulation, a musty smell, or dark streaks on sheathing. Test questionable wood with a screwdriver; soft spots may indicate rot from prolonged seepage, potentially leading to costly repairs.
Go inside. In the attic or at the ceiling chase, look for water rings, damp insulation, a musty smell, or dark streaks on sheathing. Test questionable wood with a screwdriver; soft spots indicate rot from prolonged seepage.
Log every problem. Snap pictures, with a tape measure to frame, indicate panel laps to re-seal, mortar joints that shed sand. If existing flashing placement is questionable, note foundation base, side and rear wall heights for re-layout as ripped pieces provide unreliable templates.
Stains or mold inside the building, an undersized cricket for chimney width, fasteners backed out, and previous tar patches should also be noted. Ensure that any flashing is still secure—plan to use expanding anchors or a small plastic shim to maintain proper flashing integrity.
Removal Process
Work carefully. Lift panel hems and pry fasteners with a flat bar, notching sealant lines with a hooked blade to prevent ripping the underlayment. Gently pry counter flashing out of reglets. Score tar smears so brick isn’t spalled. Pull nails and butyl from panel laps.
Dirt-clean the curb and roof plane. Vacuum grit, scrape old mortar droppings, wire-brush reglets. If painting later, wipe bare galv areas with lacquer thinner for smooth finish prep.
Repair substrate immediately. Replace punky sheathing around the curb, re-point cracked mortar joints and reset any wobbly bricks. Recycle metal offcuts, tar and mortar, per LA City/County guidelines at approved facilities – bag sharp scrap to keep crews and haulers safe.
Replacement Strategy
We choose materials to service life. Common picks: 26‑gauge galvanized sheet steel, prefinished steel to resist UV, or copper for high-end builds. If you’re even re‑roofing, retrofit your flashing with the new system so it can ride along for the roof’s 25–40‑year life.
Install in order: prep and layout; apron/base flashing; step flashing lapped with each course; cricket sized to chimney width; counter flashing set in reglets and sealed.
Trace the old pattern if it’s solid, or use your measurements. Overlap shingle-to-metal pathways to shed downhill, fasten per mfr spacing, and caulk every seam and edge with roof caulk.
Water-test, carefully, with a hose, low up, then recheck after the first big rain, for a few weeks. If any piece remains loose, fasten it with expanding anchors or a plastic shim. Schedule yearly inspections every dry season to snag wear early.
Conclusion
Great chimney flashing on a metal roof does serious work. It doesn’t let rain in. It withstands wind in SoCal canyons and winter storms in the Sierra. It sheds UV day after day. Size and fit determine the seal. Clean laps, snug bends, tight fasteners and sound sealant close the gaps. Tiny measures today prevent huge drips down the road.
On older roofs, a clean re-flash trumps patch jobs. Step flashing with wide cricket assists on wide chimneys. High-temp sealant stays put near hot flues. Stainless or galv steel survives in coastal air all over LA and Ventura.
Need some help? Contact us for a quick look, a repair scheme, or a complete re-flash. Post a couple photos and roof pitching, and receive a transparent path forward.
Frequently Asked Questions
What is chimney flashing on a metal roof?
It sheds water by means of base flashing, step flashing, and vented metal roof flashing. Done properly, it stops leaks, rot, and mold around the chimney structure.
How do I install flashing around a chimney on a metal roof?
To ensure proper waterproofing during metal roof installations, wash it down and install base flashing at the downslope side, along with vented metal roof flashing up the sides with each panel. Counterflash the chimney structure and seal it effectively using butyl tape and high-temp sealant, fastening everything with stainless fasteners for ultimate longevity. Always follow your panel manufacturers’ details.
What size should chimney flashing be for metal roofs?
Size is determined by the panel profile and chimney structure width. Base flashing should extend at least 6 inches beyond the chimney on each side, while proper flashing techniques involve step flashing legs of 4-6 inches, with counterflashing overlapping the step by 2 inches.
How does climate affect flashing choice in the U.S.?
For wet or coastal locations, employ 304l stainless steel flashing or aluminum with marine-grade sealants for metal roof installations. In snow zones, installing a cricket on chimneys over 30″ wide is essential to prevent water intrusion and ensure a watertight seal.
What causes most chimney flashing leaks on metal roofs?
Common issues include missing cricket, low flashing legs, and poor overlaps that can lead to water intrusion. Routine inspections can help identify early failures in metal roof flashings before they cause costly repairs.
Can I retrofit flashing without replacing my metal roof?
Yes, you can remove old counterflashing and install new step/base flashing where accessible, ensuring a proper watertight seal. Additionally, installing a cricket and re-counterflashing with color-matched metal and butyl tape helps prevent water intrusion.
How often should I inspect chimney flashing in Los Angeles?
Inspect each spring and after Santa Ana wind events for loose fasteners, dried sealant, and debris. Proper flashing and maintenance of metal roof installations are essential to prevent water intrusion and costly repairs.